使用Eclipse创建无错误无警告的web3.1的Servlet
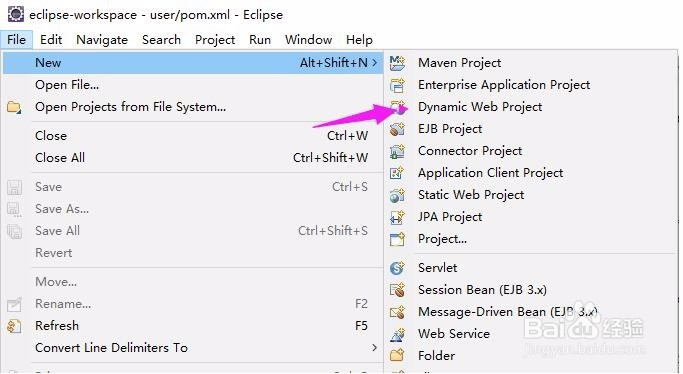
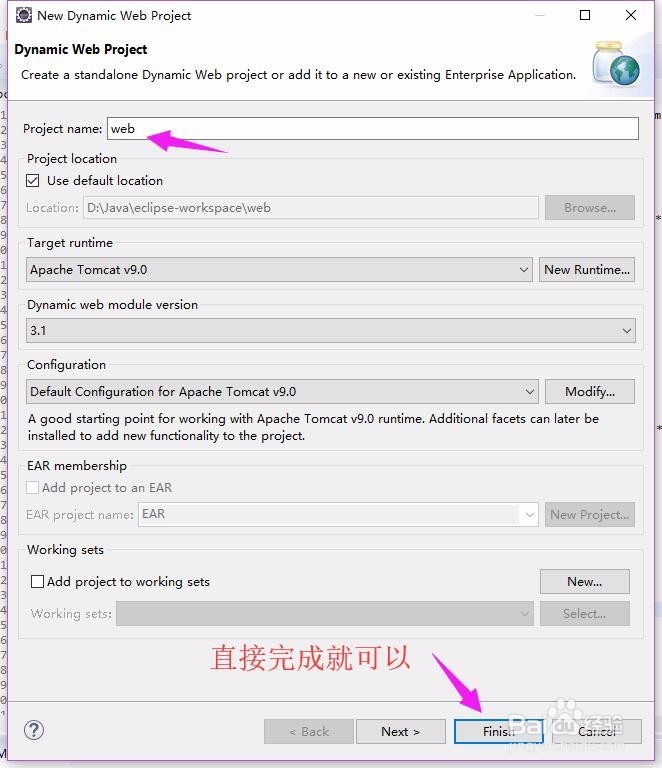
1、创建一个正常的web3.1项目
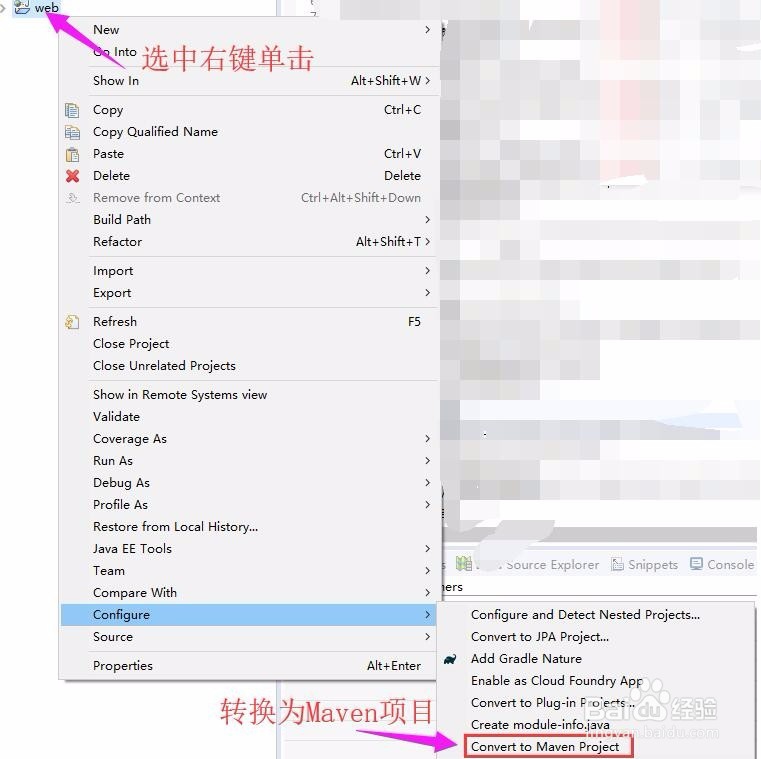
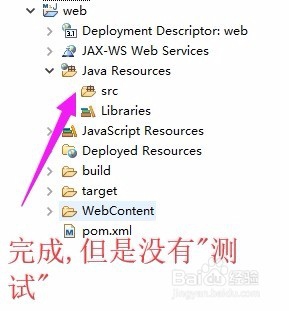
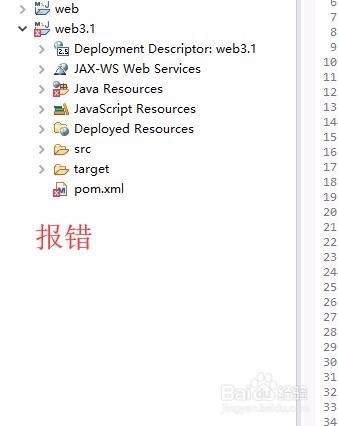
2、将该项目转换为Maven项目(转换完成的项目没有“main/java”和"test/java")等目录,但是无错误无警告
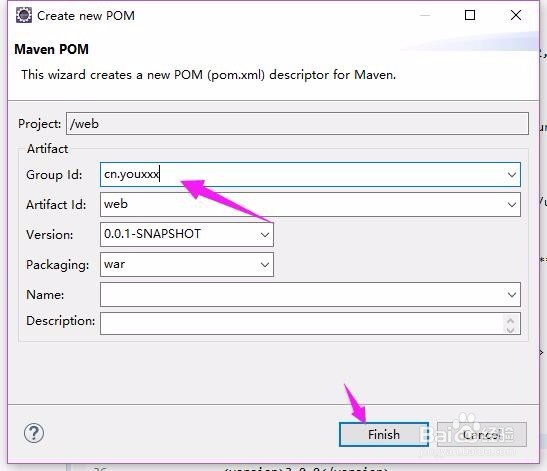
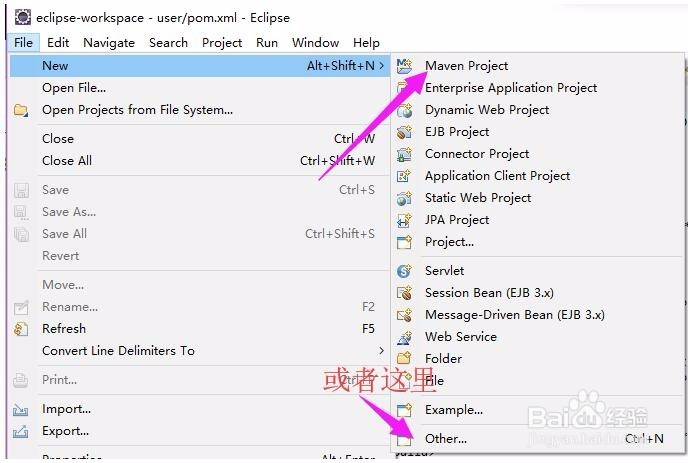
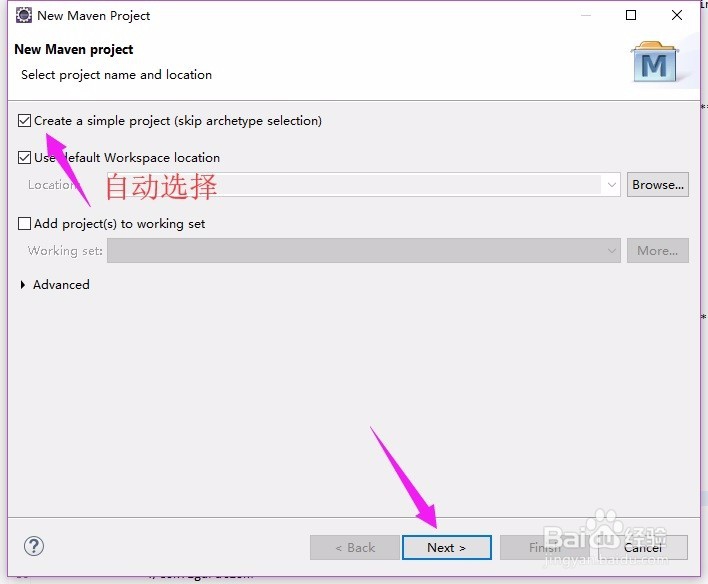
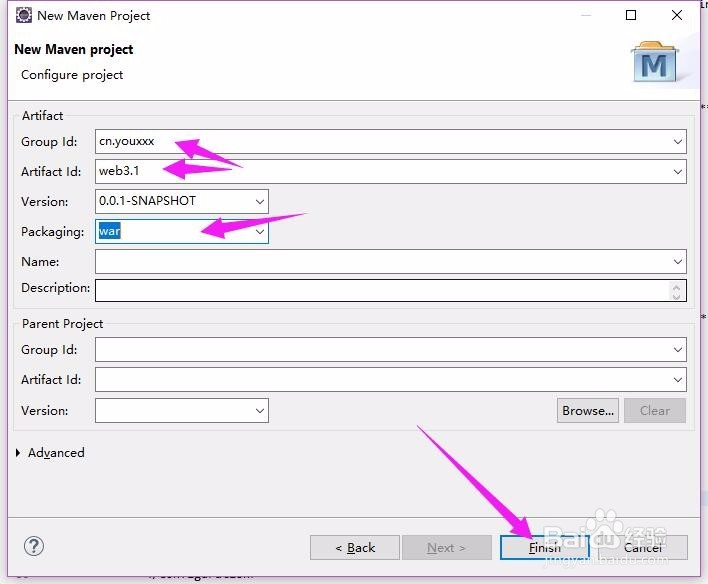
1、先创建一个web的Maven项目
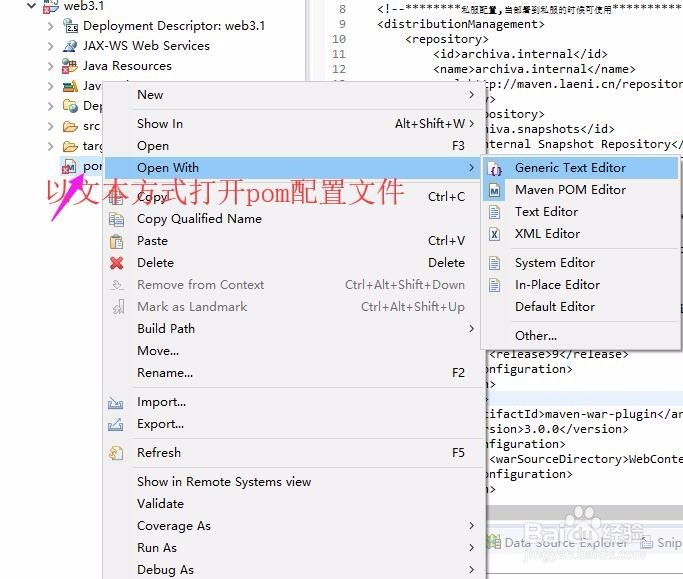
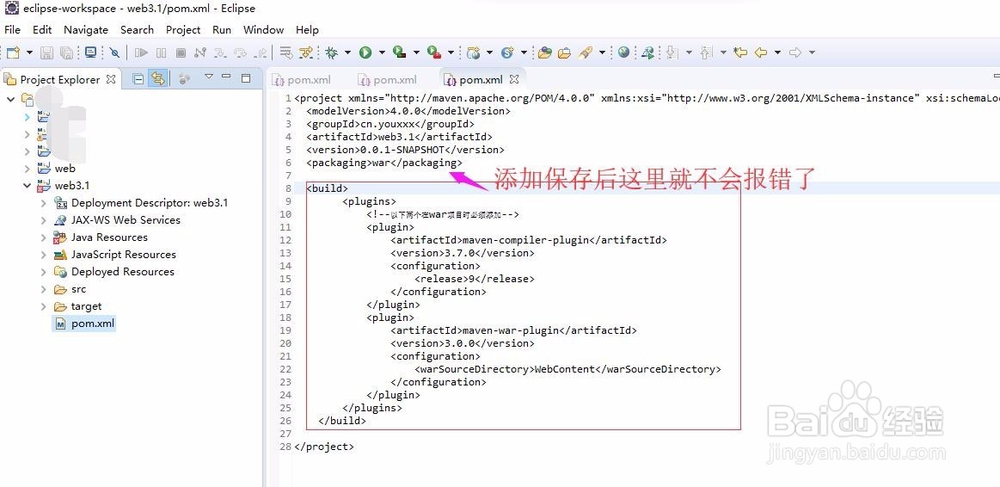
2、修改pom,在pom中添加如下代码
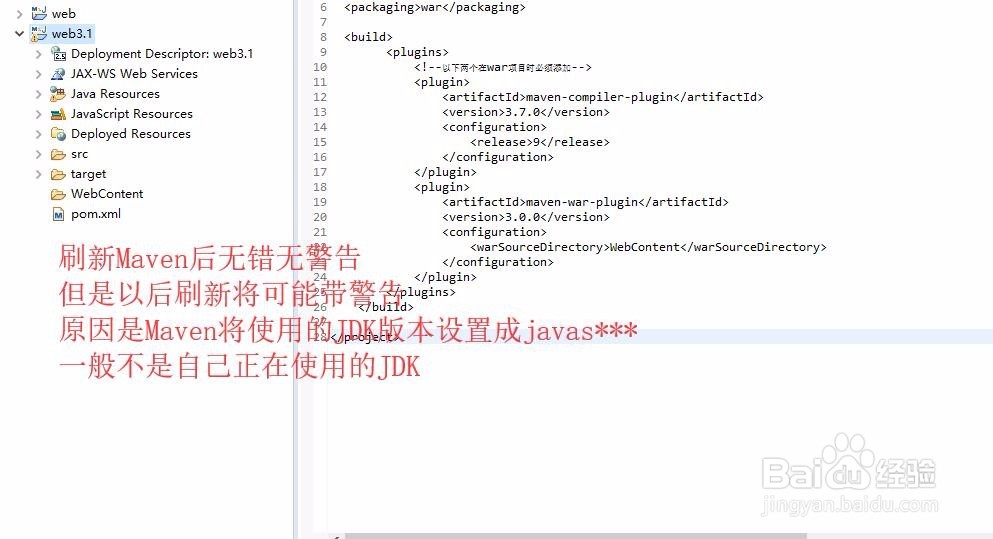
<build>
<plugins>
<!--以下两个在war项目时必须添加-->
<plugin>
<artifactId>maven-compiler-plugin</artifactId>
<version>3.7.0</version>
<configuration>
<release>9</release>
</configuration>
</plugin>
<plugin>
<artifactId>maven-war-plugin</artifactId>
<version>3.0.0</version>
<configuration>
<warSourceDirectory>WebContent</warSourceDirectory>
</configuration>
</plugin>
</plugins>
</build>
3、修改项目 .classpath 配置文件,增加Tomcat依赖
<classpathentry kind="con" path="org.eclipse.jst.server.core.container/org.eclipse.jst.server.tomcat.runtimeTarget/Apache Tomcat v9.0">
<attributes>
<attribute name="owner.project.facets" value="jst.web"/>
</attributes>
</classpathentry>

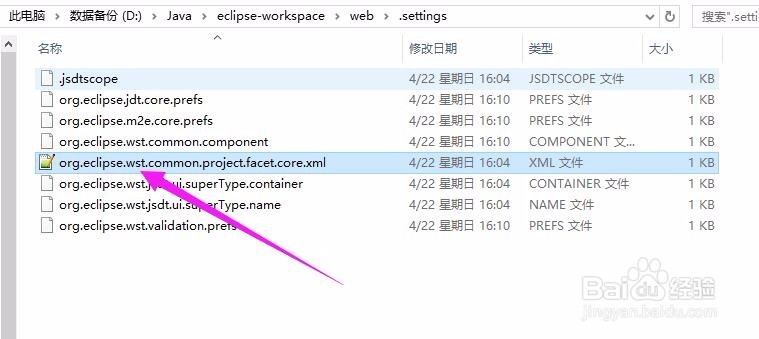
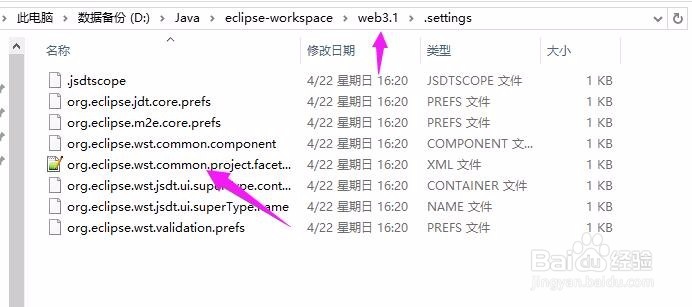
4、修改.settings\org.eclipse.wst.common.project.facet.core.xml
这里最好将步骤一自动生成的文件复制或者替换最好,下面是内容
<?xml version="1.0" encoding="UTF-8"?>
<faceted-project>
<runtime name="Apache Tomcat v9.0"/>
<fixed facet="wst.jsdt.web"/>
<fixed facet="java"/>
<fixed facet="jst.web"/>
<installed facet="jst.web" version="3.1"/>
<installed facet="wst.jsdt.web" version="1.0"/>
<installed facet="java" version="9"/>
</faceted-project>
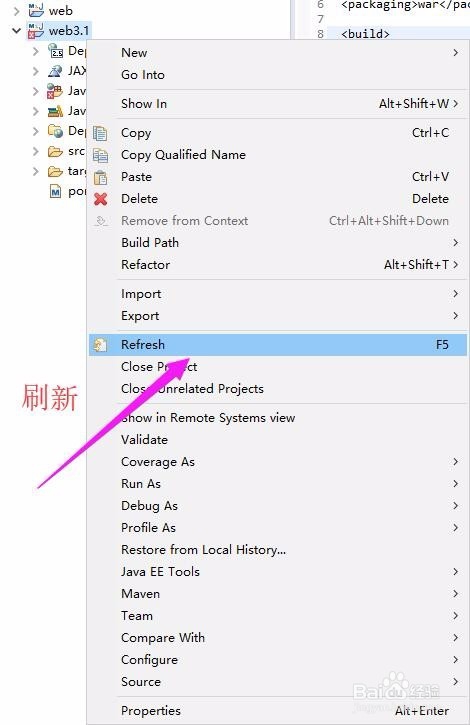
5、刷新项目
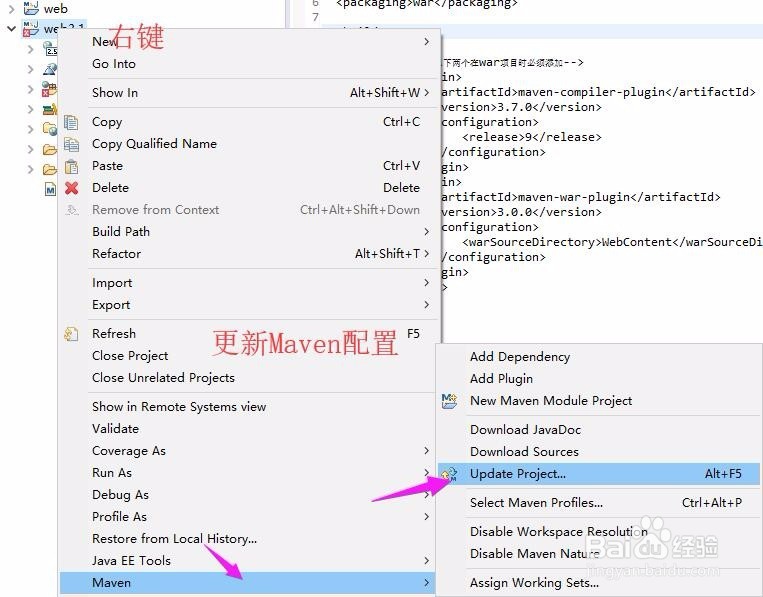
6、刷新Maven配置
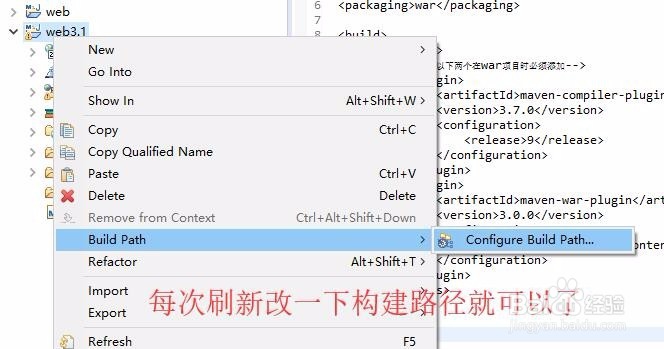
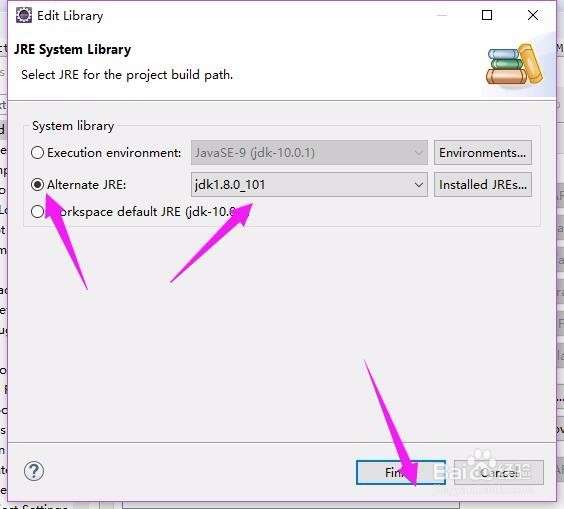
7、改构建路径